Report
The report is a summary of the statistics and analysis of the historical data of the user. The system report needs to be pre-generated according to the query conditions set by the user to view.
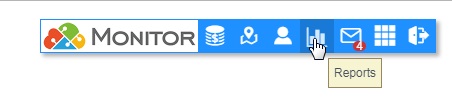
Click the report box in the navigation bar to enter the report interface.
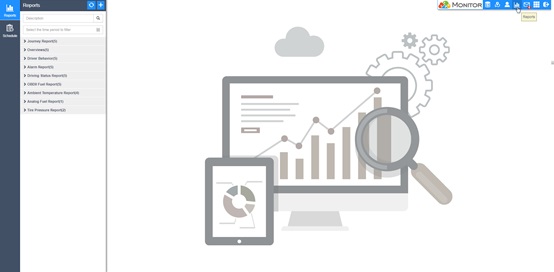
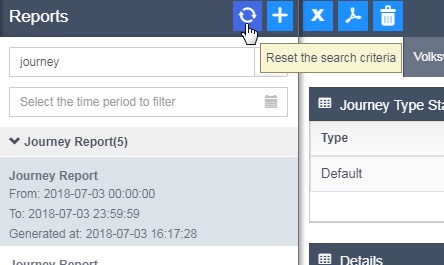
The leftmost column is mainly used to switch between the report and the scheduled report. The second column on the left is the list of currently generated reports. These reports are automatically classified according to the type. Expand these categories and you can see the sorted by time. Report item. Click on one of the reports and the report details will be displayed on the right side of the interface.
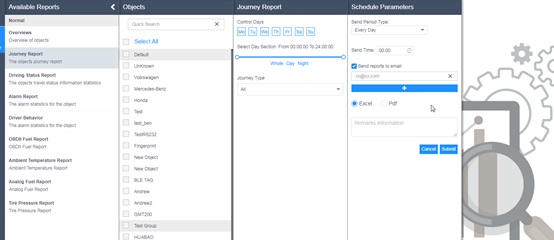
Click the plus sign in the upper right corner of the report list box to generate a new report. After clicking, the condition selection column of the report will expand. First, you need to select the type of report you want to generate, as shown in the figure.
After selecting a report type, the device selection list and condition selection list will pop up on the right.
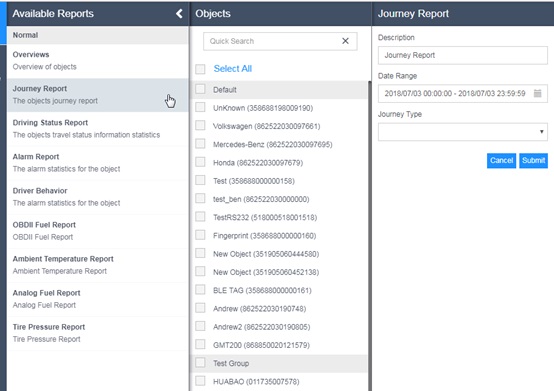
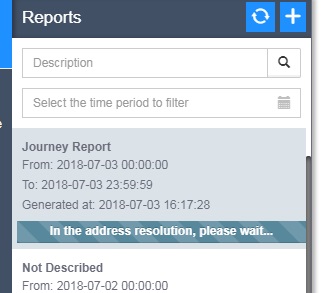
Select the object you want to view data in the device selection list, and select some report filter conditions in the condition selection list. For example, in the sample image, you can fill in the name of the generated report, the time period for pulling data, and the type of mileage. After you have selected, click Submit to send a request for a new report to the platform. After the request returns successfully, the progress of the report generation will be displayed in the report list.
Place the mouse over the generated report entry and the Configure and Delete buttons appear in the upper right corner of the entry.

Click the Configure button and the list of conditional options for this report will reappear and you can modify it to generate a new report.
Place the mouse over the category entry in the report list. An action button will appear on the right side of the entry. You can use these buttons to sort the entries or delete the reports under that type in bulk.
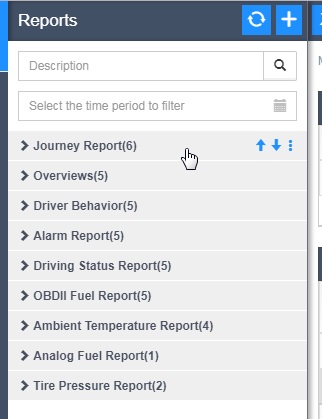
Above the report list bar is the filter input box of the report. You can enter the keyword or query range time to filter the report that needs to be displayed. Click the refresh button to reset the filter condition.
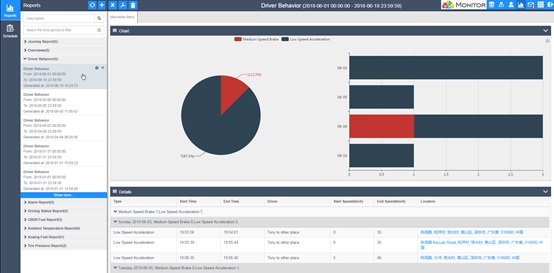
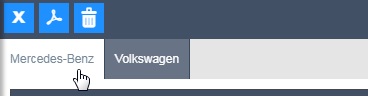
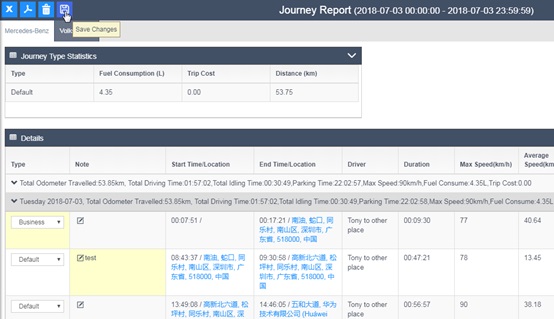
The three buttons in the upper left corner of the display area of the report details are the excel file for downloading the report, the pdf file for downloading the report, and delete report. The button below is the object list selection column, where the object selected in the new condition of the report is listed. Click to select the object you want to display for viewing.
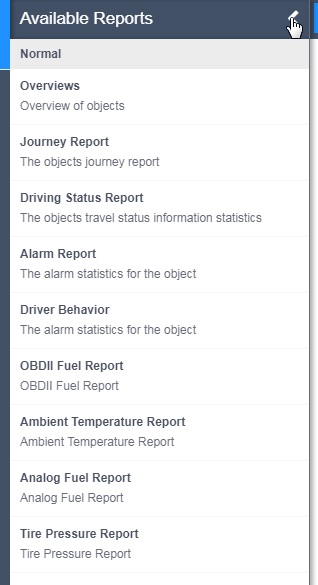
Report type:
- overview
Show summary statistics for some devices
- Journey Report
The travel journey report of the device, you can set the type and remark of each mileage in the report.
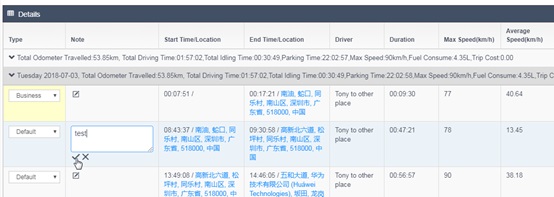
After the modification is completed, the save button will appear in the upper left corner. Clicking Save to save the report will regenerate.
- Driving Status Report
The driving information statistics report of the equipment shows the ignition time, idle time and parking time distribution of the vehicle during driving.
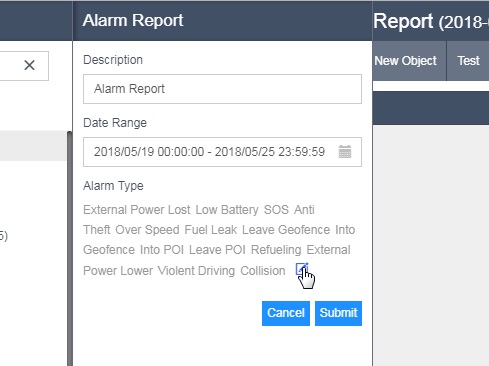
- Alarm Report
Shows the time and quantity distribution of various alarms of the device. The alarm type of the query can be edited.
- Driver Behavior
Demonstrate the driving behavior of the vehicle,
- OBDII Fuel Report
Oil quantity information display of OBDII equipment
- Ambient Temperature Report
Statistical display of simulated temperature information collected by the device
- Analog Fuel Report
Statistical display of simulated oil quantity information collected by the equipment
- Tire Pressure Report
Statistical display of tire pressure information collected by the equipment
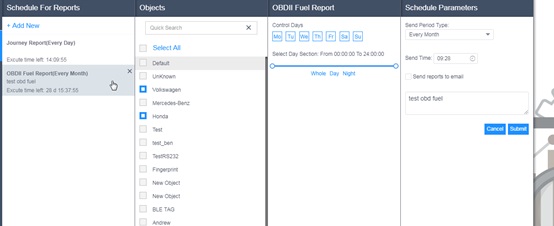
The schedule report function can realize the background timing to automatically generate the corresponding report and send it to the set email address. Click the plan report section to enter the management interface of the schedule report.
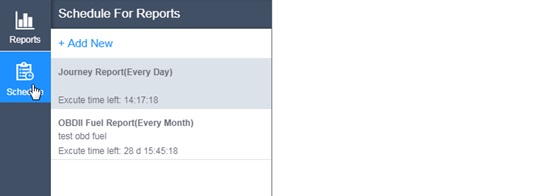
On the left is the list of scheduled tasks. You can create a new plan by using the Add New button. You also need to select the type of report generated. The configuration process is similar to the report. The difference is that you need to configure the execution time and period of the plan. You can also choose to generate the report. After sending the email address.
After the new creation is successful, the remaining time of the next execution will be displayed in the list. Clicking on the item in the list will pop up the configuration list to modify the configuration of the plan.